so i know Christmas is over but i thought i'd share some Christmas creativity which might inspire you all for Christmas 2012 ...
i think i’ve mentioned before that my new addiction is pinterest. during one of my daily searches recently i came across a pic of some wedding decorations which had been sourced from martha stewart weddings which had used a craft technique called fringing. the texture created by all the tiny pieces of paper looks amazing. after further searching i came across a “how to” fringed save the date on green wedding shoes wedding blog. each year i like to add a little hand-made touch to all the Christmas gifts i give and this year i decided to adapt the fringing idea from wedding to festive. i ordered myself a pair of fringing scissors from here and came up with the idea to use the fringing idea as gift tags. as it was my first attempt and I had to have them done early to fit in with my big blended family’s quasi christmas on 17 december i opted for a simple bauble shaped gift tag (I had originally planned to use the initial of the gift recipient but ran out of time). here’s how i made them…
what you’ll need:
1. fringing scissors
2. scissors
2. cardstock (for the bauble)
3. tissue paper (in various colours – i used red and green)
4. a template of your chosen shape
5. glue
instructions..
1. take your cardstock and the template and cut the number of gift tags you need (alternatively, if you have a good printer, print your shape directly onto the cardstock).
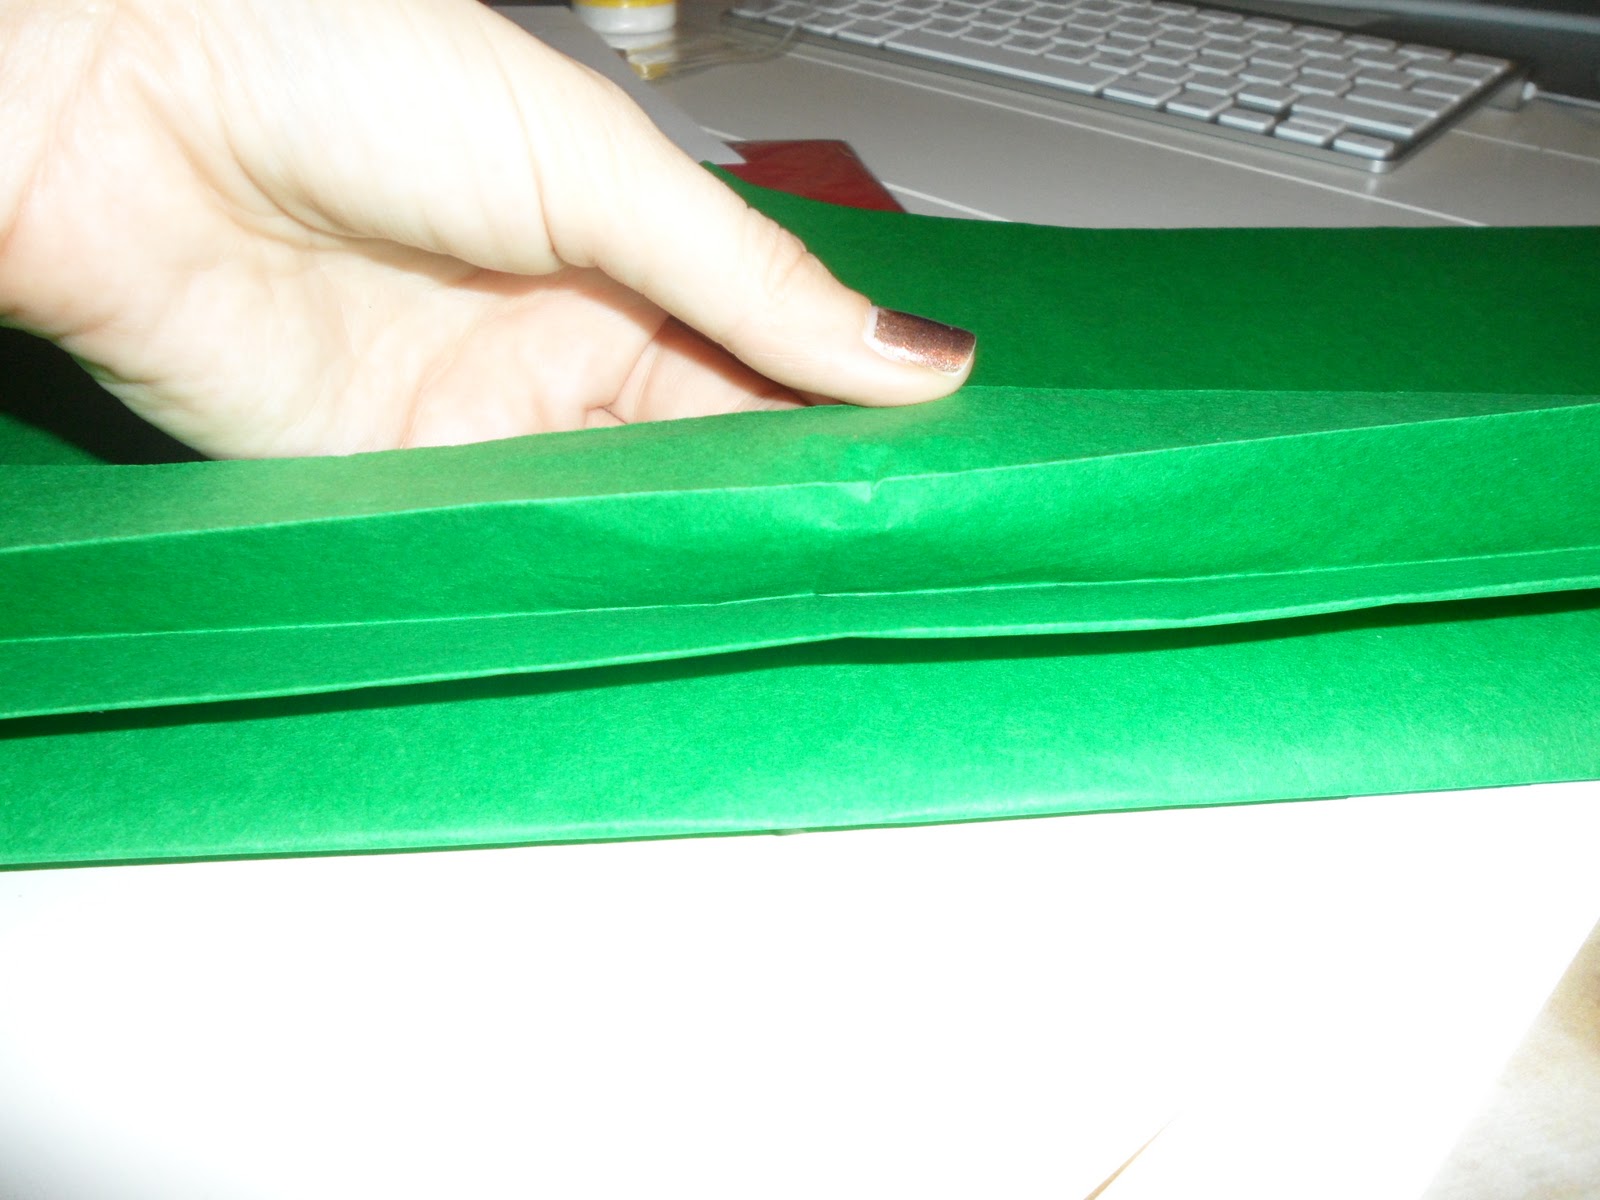
2. take one sheet of tissue paper, fold it in half and make 4 concertina folds (back and forth continuous parallel folding - like an accordion) with each fold approximately 1.5cm in width (depending on size of your shape). then cut off that strip.
3. repeat step 2 until you have 4 strips of fringe (more if you need to make more than ½ doz baubles).
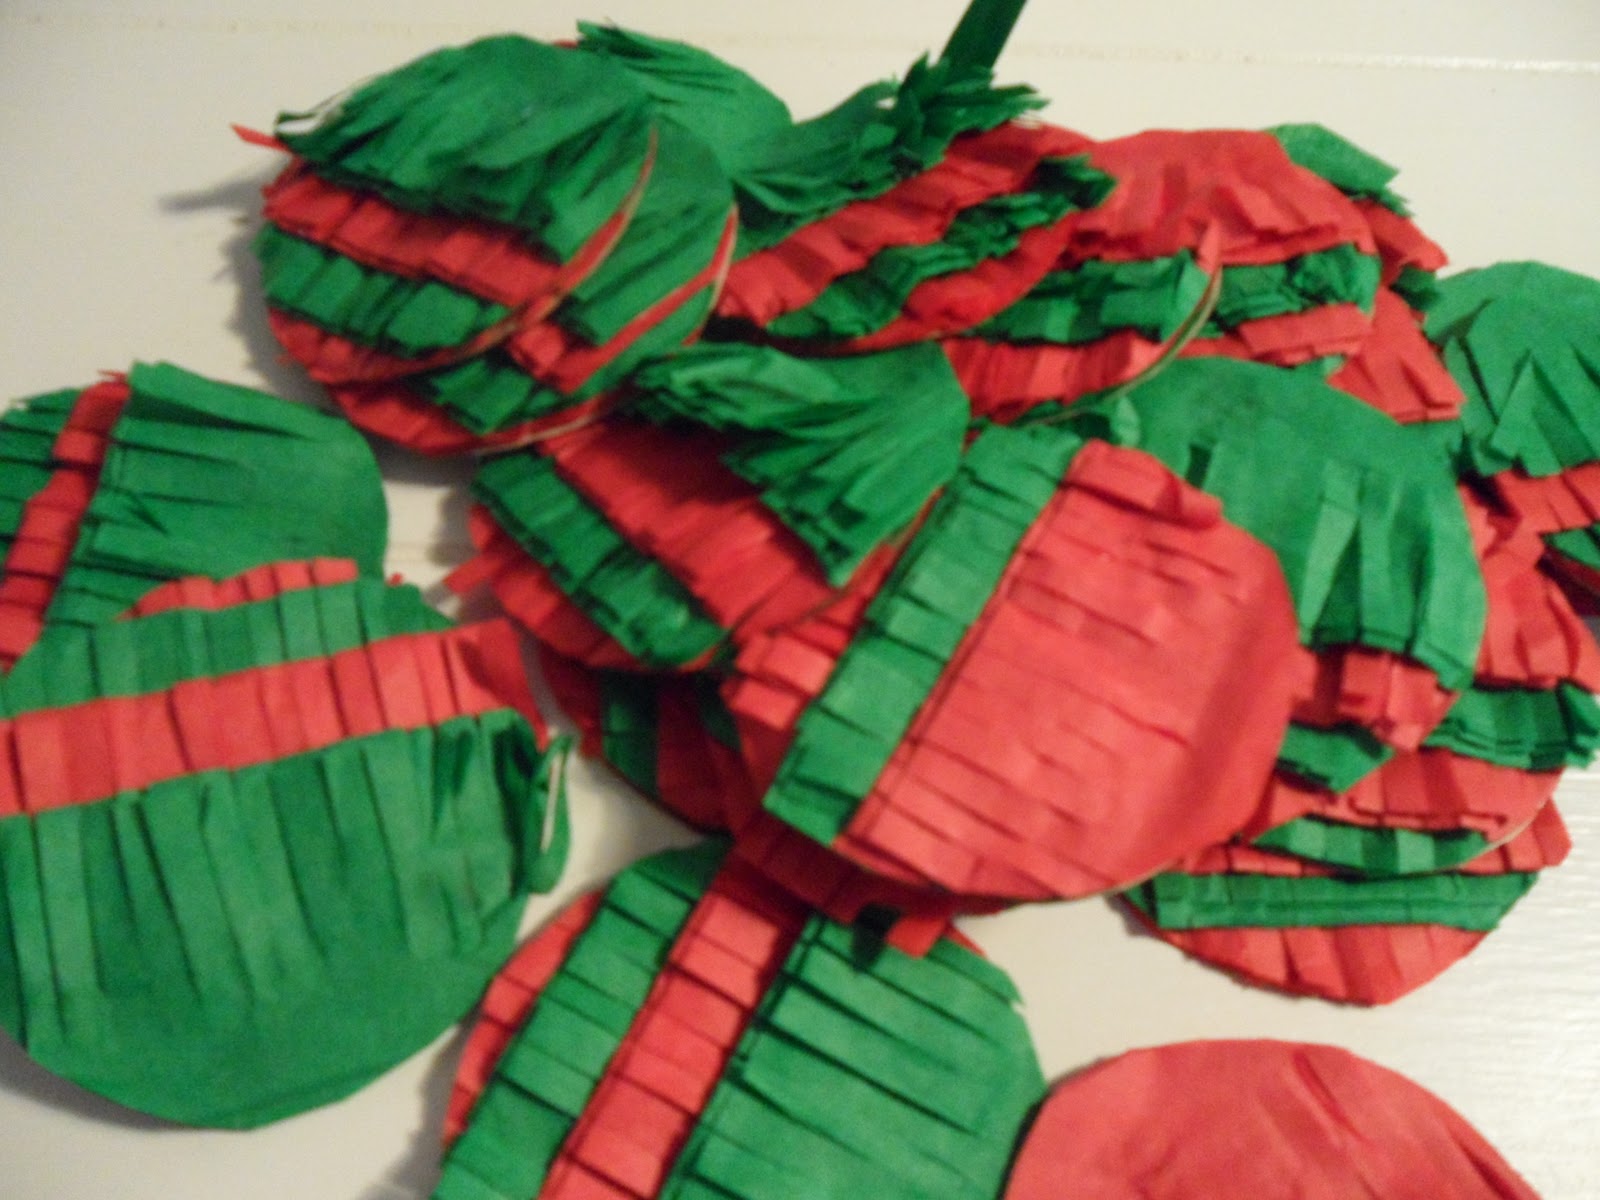
4. overlap each fringe strip and hold the template to check you have made enough fringe to cover the whole shape.
5. now, glue each strip of fringe to the one below.
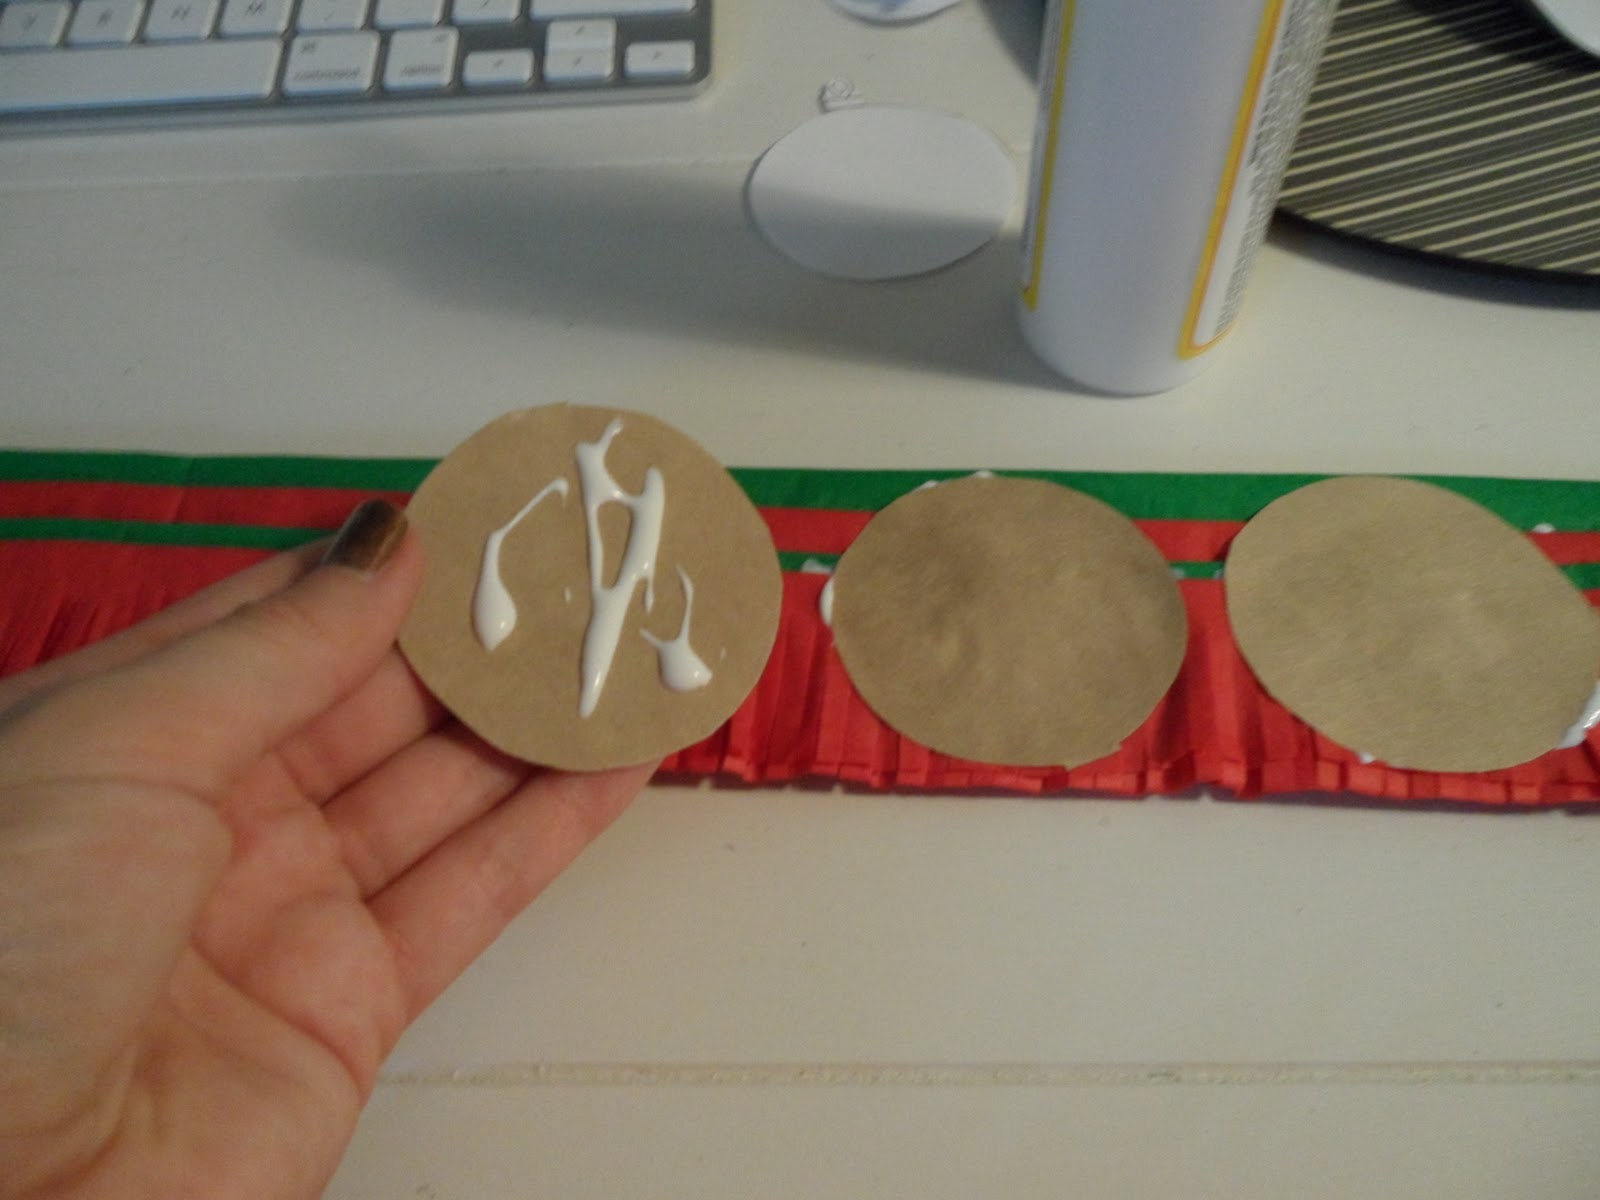
6. next, place glue on the template and stick the template behind the fringe.
7. finally, cut all the excess fringe away from the template.


No comments:
Post a Comment